WHMCS:ADDON
STEP 1: INSTALLATION:
WHMCS ESXI Addon installtion guide:
1- Upload addon zip file to whmcs root directory and extract it.
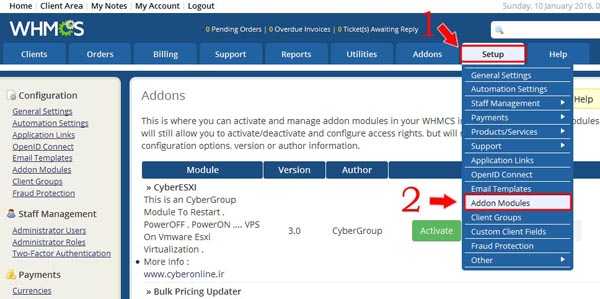
2- Enter WHMCS Admin area and click on "Addon Modules" sub menu of "Setup"
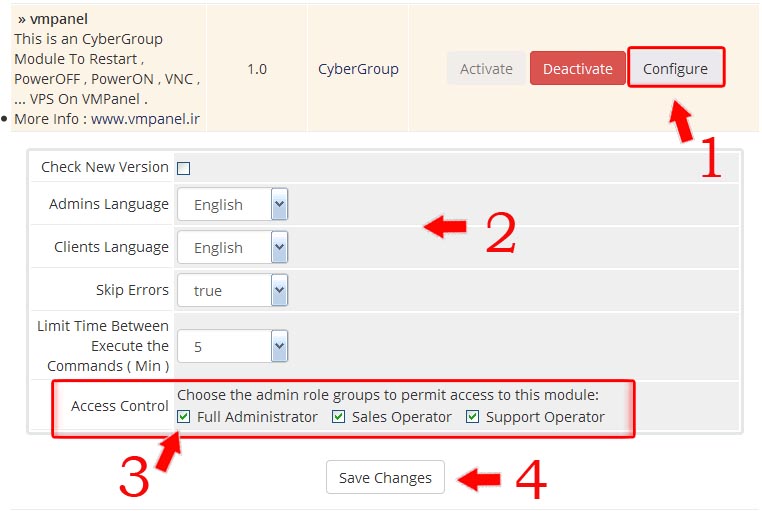
3- Click on "Activate" to actviate the module.
4- Click on "Configure" and configure WHMCS ESXI Addon
Check new version: This option check automatically module update
Note: This option may reduce addon load operation speed
Skip Errors: This option shows module errors ( enable this option only for debug errors )
Limit Time between execute the commands (Min): This option will limit client command in Minutes
Access Control: Set addon permissions ( If you logged in as Full administrator user select "Full Administrator" )
5- Click on "Save Changes" after configure addon.
STEP 2: ADDING SERVERS:
After install module you should add your ESXi Servers to WHMCS,For do it follow below steps:
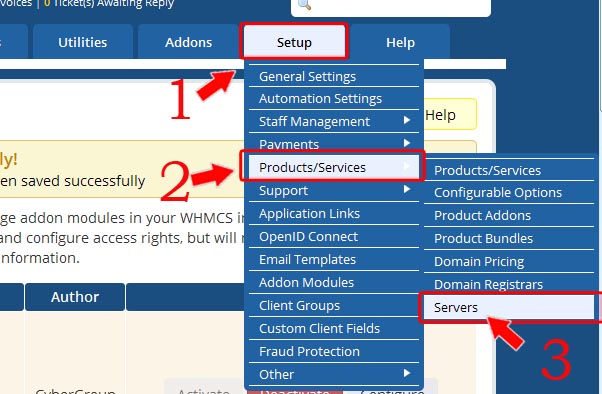
1- Enter WHMCS Admin area and click on " Setup > Products/Services > Servers "
2- add your ESXi servers:
Name: Name of Server (Example: Server1)
Hostname : Hostname of server (Example: Server1.domain.com)
IP Address: IP of you VMPanel (Example: 1.2.3.4)
Type: select "vmpanel"
UserName: VMPanel whmcs api username ( admin or reseller )
Password: VMPanel whmcs api Password


