WHMCS:ADDON
WHMCS VMPanel Addon installtion guide:
STEP 1: INSTALLATION:
1- Upload addon zip file to whmcs root directory and extract it.
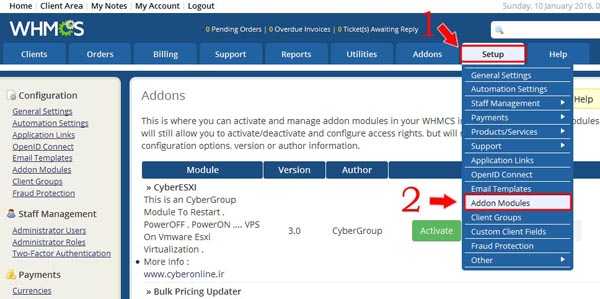
2- Enter WHMCS Admin area and click on "Addon Modules" sub menu of "Setup"
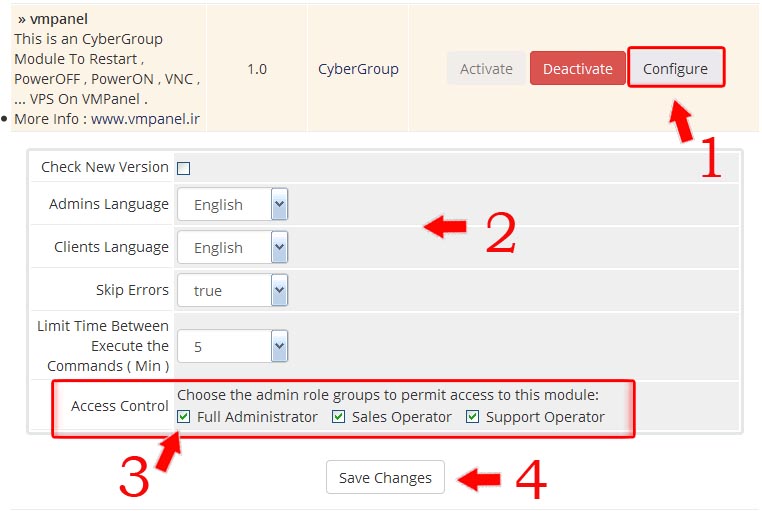
3- Click on "Activate" to actviate the module.
4- Click on "Configure" and configure WHMCS ESXI Addon
Check new version: This option check automatically module update
Note: This option may reduce addon load operation speed
Skip Errors: This option shows module errors ( enable this option only for debug errors )
Limit Time between execute the commands (Min): This option will limit client command in Minutes
Access Control: Set addon permissions ( If you logged in as Full administrator user select "Full Administrator" )
5- Click on "Save Changes" after configure addon.
STEP 2: ADDING SERVERS:
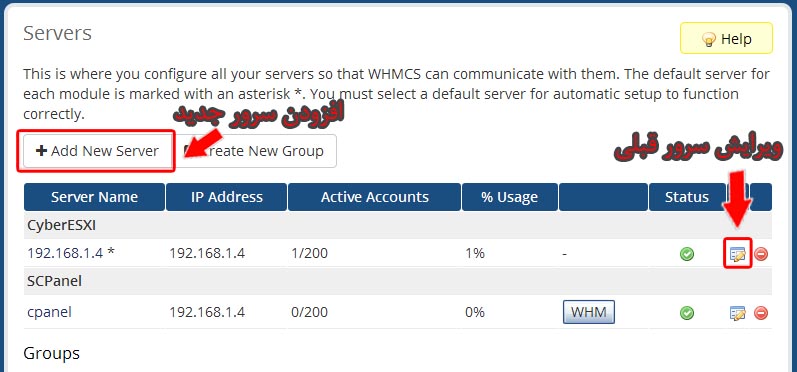
After install module you should add your ESXi Servers to WHMCS,For do it follow below steps:
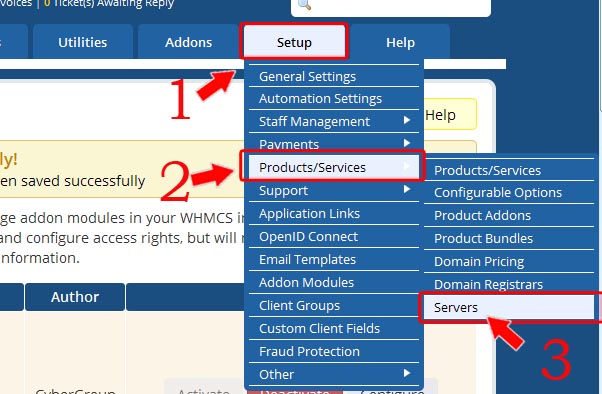
1- Enter WHMCS Admin area and click on " Setup > Products/Services > Servers "
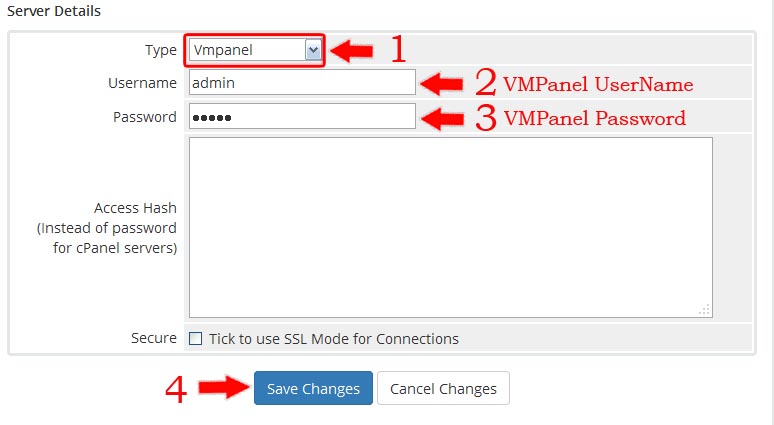
2- add your ESXi servers:
Name: Name of Server (Example: Server1)
Hostname : Hostname of server (Example: Server1.domain.com)
IP Address: IP of you VMPanel (Example: 1.2.3.4)
Type: select "vmpanel"
UserName: VMPanel whmcs api username ( admin or reseller )
Password: VMPanel whmcs api Password
3- Click on "Save Changes" after configure servers.
If Addon Connected To Panel Successfully show : " Connected Successfully ."
Note: If you have more than one server,you can follow above for add other servers.
STEP 3: PRODUCT SETUP
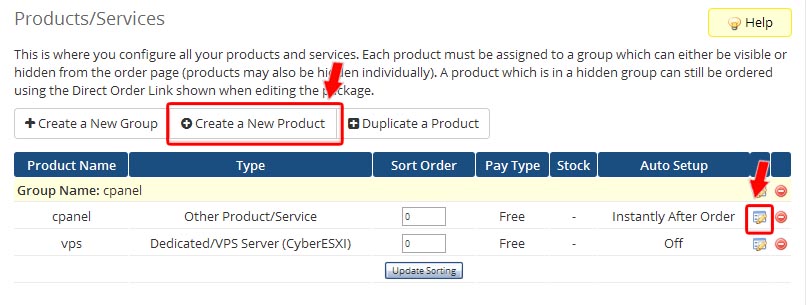
1- Enter WHMCS Admin area and click on " Setup > Products/Services > Products/Services "
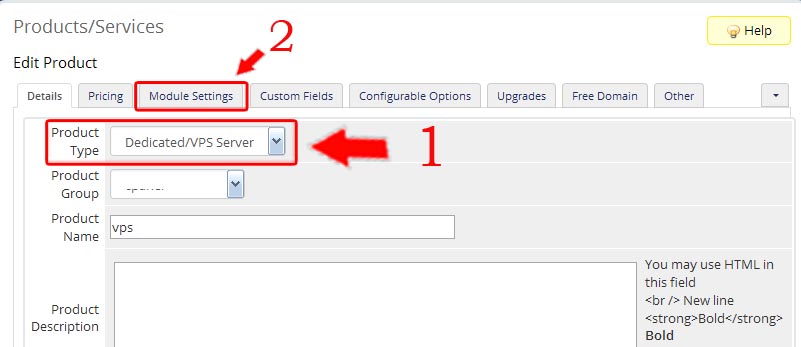
2- Create New Product OR Click on "Edit icon" which product that want connect it to VMPanel Server
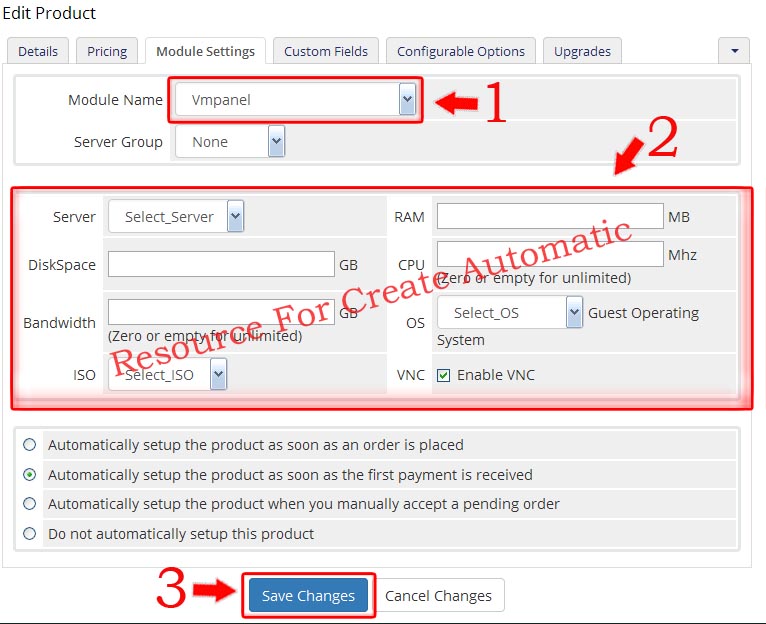
3- Click on "Module setting tab" and select "vmpanel" from drop down Module Names.
Enter VPS Resource if you want use automatic create vps (2)
4- Select Server that you created on step 2.
5- Click on "Save Changes".
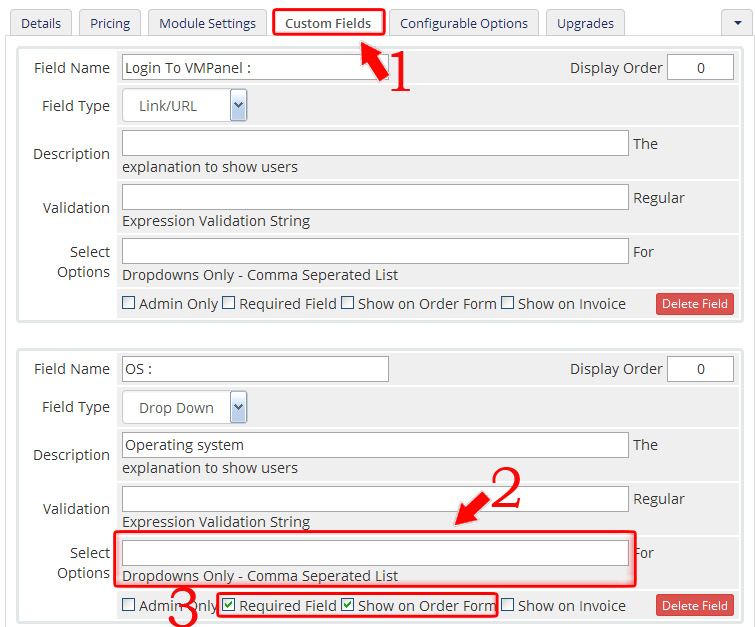
Notice : if you want client can select os on order form go to Custom Fields tab
num 2 : Enter Filename From Panel ( Media -> List ISO ) ( Separate with Comma )
nom 3 : Check Ticked "Required Field" And "Show On Order Form"
---->>> Save
STEP 4: SETUP YOU LICENSE KEY
1- Enter WHMCS Admin area and click on " Addons > VMPanel "
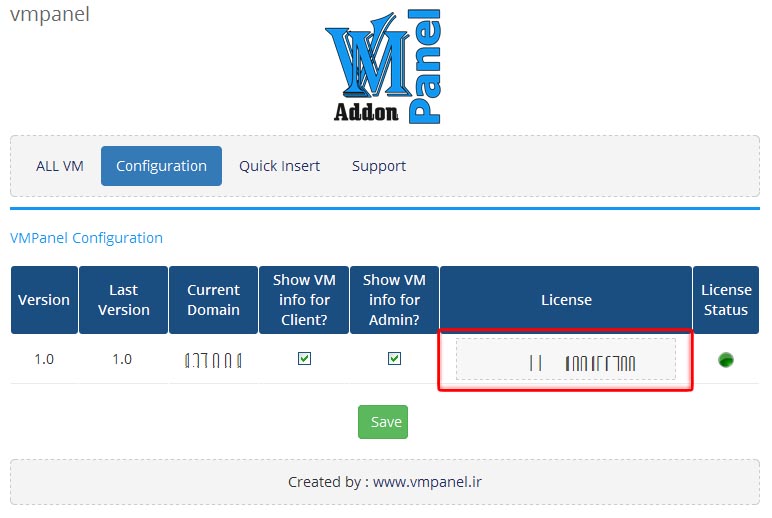
2- Click on "Configuration" Tab
3- Enter your vmpanel Addon License key in "License" field And click on "Save"
After that "License status" should be Green light . if not,your license is expired or is not valid.
Show VM info for Admin: This option show VMs (Virutal Machines) details in client Products WHMCS admin panel.
Show VM info for Client: This option show VMs details in client Products WHMCS Clientarea.
Current Domian: licensed domian.
Last version: Last avaliable Addon version.
Version: Current Addon on your WHMCS.
STEP 5: Add VMs to clients.
Note: If you have clients that they have VM , follow this step to Connect their services to ESXi server.
You can add services with 2 methods.
if you have a lot of VMs recommend method 2.
Method 1 : Use Client services
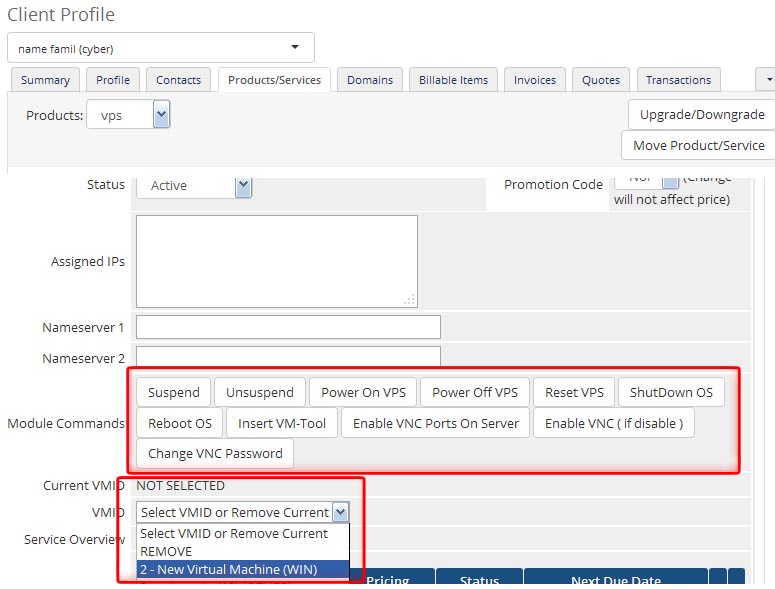
Select your client and enter "Products/Services" Tab.
Select VM Name from drop down in "VPSID"
Note: If you want to remove client VM from whmcs clientarea,select "REMOVE" in drop down (This option will NOT delete your VM from ESXi server)
Click on "Save Changes" after configure client VM.
Method 2 : Use Quick insert
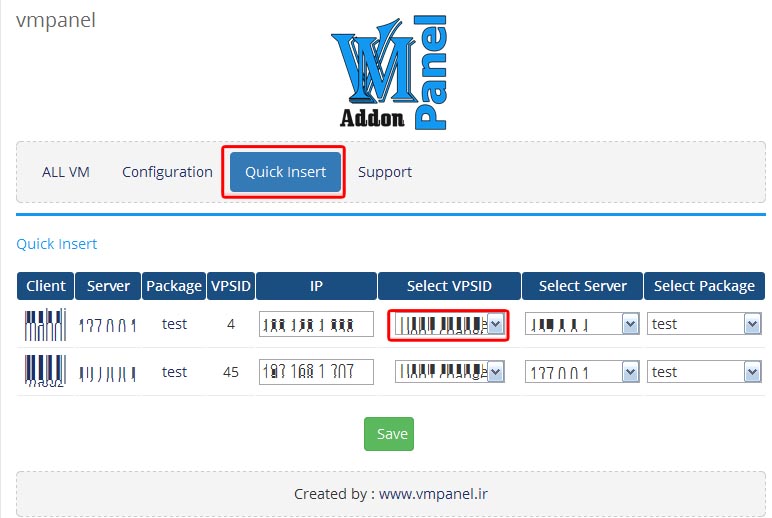
Enter "Addons > WHMCESXi > Quick Inster" Tab
In this page you can select client VM from "Select VPSID" Also you can configure "Client ip,packages,...."
Click on "Save" after configure client VM.
Congratulations! Your module is ready for use!
